May 13, 2026
Transparent avatar backgrounds with WebGL green-screen keying
![]()
This recipe shows how to make an Anam avatar feel embedded in your product instead of boxed into a rectangular video player. We'll create a custom avatar from a green-screen image, stream the avatar into a hidden <video>, remove the green pixels in a WebGL-backed <canvas>, and place that transparent canvas over a page background.
The complete example code is at examples/transparent-background-nextjs.
What you'll build
A Next.js app that:
- Creates a custom Anam avatar from a green-screen source image
- Uses that avatar in a standard Anam session token
- Streams Anam video into a hidden browser video element
- Applies chroma-key transparency with a WebGL fragment shader
- Places the keyed avatar directly over an Anam docs page background
- Includes a client tool that can switch the scene behind the avatar
Prerequisites
- Node.js 20+
- pnpm
- An Anam API key from lab.anam.ai
- Access to custom avatar creation for your organization
Never expose your Anam API key in client-side code. The browser asks your server for a session token; only the server calls Anam with ANAM_API_KEY.
Project setup
Clone the cookbook and install the example:
git clone https://github.com/anam-org/anam-cookbook.git
cd anam-cookbook/examples/transparent-background-nextjs
pnpm install
cp .env.example .env.local
Add your API key:
ANAM_API_KEY=your_anam_api_key_hereUse a green-screen source image
The custom avatar needs a plain green background so the browser can remove it later. This example includes a downsampled version of the source image used to create the avatar:
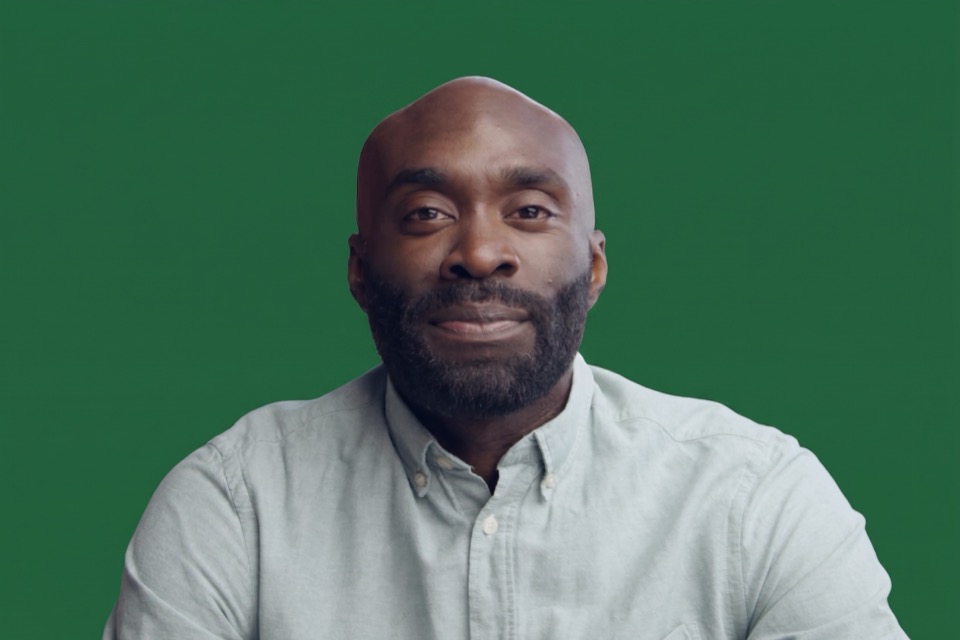
The file in the example is public/greenscreen-david.jpg. It is 3:2, larger than 720x480, and below the upload size limit.
The custom avatar best practices recommend JPEG or PNG, at least 720x480, and 3:2 or 16:9 framing. Keep the background a consistent green and leave a little room around the head and shoulders.
Text-to-image tools like Nano Banana are great for swapping an existing portrait background to green. In the prompt, specify that there should be no green spill on the person or around the border. Otherwise, image models often add green edge glow as if the subject were standing in front of a real green screen, which makes the browser key harder to tune.
Create the custom avatar
The example includes a small Node script that calls the Create Avatar endpoint. The endpoint accepts either multipart/form-data with imageFile, or JSON with imageUrl; this script uses the local image file.
pnpm create-avatarThe script prints an environment variable:
ANAM_AVATAR_ID=...Copy that value into .env.local:
ANAM_API_KEY=your_anam_api_key_here
ANAM_AVATAR_ID=your_green_screen_avatar_id_here
ANAM_VOICE_ID=6af524f7-68e3-4ecd-933d-c06e3d8ef9b8
ANAM_LLM_ID=0934d97d-0c3a-4f33-91b0-5e136a0ef466
ANAM_AVATAR_MODEL=cara-4-latest
The core of the script is just a FormData upload:
const body = new FormData();

body.append("displayName", "Green Screen David");
body.append("avatarModel", "cara-4-latest");
body.append(
  "imageFile",
  new Blob([image], { type: "image/jpeg" }),
  "greenscreen-david.jpg",
);

const response = await fetch("https://api.anam.ai/v1/avatars", {
  method: "POST",
  headers: {
    Authorization: `Bearer ${apiKey}`,
  },
  body,
});
Create a session token
Once the avatar exists, use its avatarId in a normal persona config. The browser calls this route before starting the Anam SDK client:
// src/app/api/session-token/route.ts

const response = await fetch("https://api.anam.ai/v1/auth/session-token", {
  method: "POST",
  headers: {
    "Content-Type": "application/json",
    Authorization: `Bearer ${apiKey}`,
  },
  body: JSON.stringify({
    personaConfig: {
      name: "Transparent Background Concierge",
      avatarId: process.env.ANAM_AVATAR_ID,
      avatarModel: "cara-4-latest",
      voiceId: process.env.ANAM_VOICE_ID,
      llmId: process.env.ANAM_LLM_ID,
      systemPrompt: "You are a concise product concierge embedded directly into a website.",
    },
  }),
});
Stream into a hidden video
The SDK still streams into a video element. We keep that video available for audio playback and as a canvas source, but hide it visually:
<GreenScreenCanvas
  videoElementId="anam-hidden-video"
  fallbackImageSrc="/greenscreen-david.jpg"
  isStreaming={connectionState === "connected"}
  settings={settings}
/>

<video
  id="anam-hidden-video"
  autoPlay
  playsInline
  className="hidden-video"
/>
The GreenScreenCanvas component is a custom React component that creates a canvas element and draws the video frame to it. The full source code is available in GreenScreenCanvas.tsx. We will walk through key parts of the code below.
Then start Anam in the usual way:
const sessionToken = await fetchSessionToken();
const client = createClient(sessionToken);

await client.streamToVideoElement("anam-hidden-video");
Key the green pixels in WebGL
The canvas loop draws either the live video frame or the fallback source image into a WebGL texture. The fragment shader keys each pixel on the GPU, so the browser does not need to call getImageData, loop over every pixel in JavaScript, and write the frame back with putImageData.
const fragmentShaderSource = `
precision mediump float;

uniform sampler2D u_source;
uniform float u_minGreen;
uniform float u_greenBias;
uniform float u_softness;
uniform float u_spill;

varying vec2 v_texCoord;

void main() {
  vec4 texel = texture2D(u_source, v_texCoord);
  float red = texel.r * 255.0;
  float green = texel.g * 255.0;
  float blue = texel.b * 255.0;
  float minChannel = min(red, min(green, blue));
  float maxRedBlue = max(red, blue);
  float maxChannel = max(red, max(green, blue));
  float saturation = maxChannel == 0.0
    ? 0.0
    : (maxChannel - minChannel) / maxChannel;
  float greenDominance = green - maxRedBlue;
  float keyRamp = max(8.0, u_softness * 0.55);
  bool isGreen =
    green == maxChannel &&
    green > u_minGreen &&
    green > red * u_greenBias &&
    green > blue * u_greenBias &&
    saturation > 0.08 &&
    greenDominance > 2.0;

  vec3 color = texel.rgb;
  float alpha = texel.a;

  if (isGreen) {
    float keyedAmount = clamp(
      (greenDominance - 2.0) / keyRamp + (saturation - 0.08) * 1.8,
      0.0,
      1.0
    );
    alpha = texel.a * (1.0 - keyedAmount);
  } else if (greenDominance > 8.0 && green > 70.0) {
    color.g = max(0.0, green - greenDominance * u_spill) / 255.0;
  }

  gl_FragColor = vec4(color, alpha);
}
`;
Each animation frame uploads the current video frame to the texture, updates the keying uniforms, and draws one full-canvas rectangle:
gl.texImage2D(
  gl.TEXTURE_2D,
  0,
  gl.RGBA,
  gl.RGBA,
  gl.UNSIGNED_BYTE,
  source,
);
gl.uniform1f(uniforms.minGreen, settings.minGreen);
gl.uniform1f(uniforms.greenBias, settings.greenBias);
gl.uniform1f(uniforms.softness, settings.softness);
gl.uniform1f(uniforms.spill, settings.spill);
gl.drawArrays(gl.TRIANGLES, 0, 6);
This keeps the per-pixel work on the GPU and leaves JavaScript responsible only for choosing the source frame and updating settings.
Place the avatar into the page
Once the canvas has transparent pixels, it behaves like any other transparent layer. The example positions it over a docs page background and lets the surrounding UI show through:
.avatar-canvas {
  position: absolute;
  right: -4vw;
  bottom: -12vh;
  width: min(58vw, 860px);
  height: auto;
  filter: drop-shadow(0 34px 42px rgba(0, 0, 0, 0.32));
}
The headline screenshot uses an Anam docs page image, but the same technique works over product tours, dashboards, checkout flows, education content, games, or any other DOM you control.
Change the scene with a client tool
The example persona includes a small client tool:
{
  type: "client",
  name: "set_showcase_scene",
  description:
    "Change the page scene behind the transparent avatar when the user asks for a different background, setting, mood, or use case.",
  parameters: {
    type: "object",
    properties: {
      scene: {
        type: "string",
        enum: ["docs", "studio", "product"],
      },
    },
    required: ["scene"],
  },
}
The browser listens for the tool event and updates React state:
client.addListener(AnamEvent.CLIENT_TOOL_EVENT_RECEIVED, (event) => {
  if (event.eventName !== "set_showcase_scene") return;
  setScene(event.eventData.scene);
});
This is where the pattern gets interesting. Instead of switching between preset scenes, you could have the avatar call a server-side tool that sends a prompt to a text-to-image model, returns the generated background URL, and updates the CSS behind the transparent canvas while the avatar keeps talking.
Running the app
pnpm devOpen http://localhost:3000, click Start conversation, and try:
- "Change the background to the studio."
- "Show me the product view."
- "How could this avatar guide a user through this page?"
Click Clean view to hide the demo controls and see only the keyed avatar over the page. Move the pointer to reveal the Controls button again, or press Escape to bring the tuning panel back.
Tuning
If you still see green around the avatar, adjust the controls in the example or change the defaults in GreenScreenCanvas.tsx:
minGreencontrols how green a pixel needs to be before it can be removedgreenBiasrequires the green channel to dominate red and bluesoftnesscontrols how quickly green pixels fade to transparentspillreduces green tint on nearby edge pixels
Docs: Create Avatar, Custom Avatar Best Practices, JavaScript SDK embedding overview.